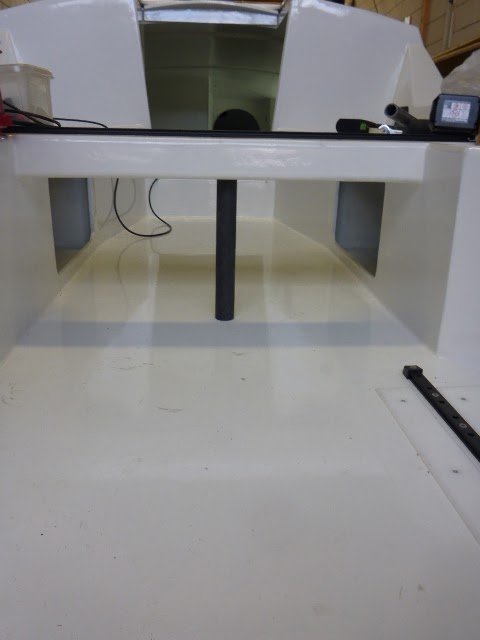
Yesterday I had no time left to place the pictures so I place them today. I started the morning with some sanding of the rudder bracket and them Fetske did come to assist me with gluing eye and the mast raise plates on the sides, I did not take pictures of both. We then Glued the bailers for the water ballast tank in place. I then made some plates on the tiller post to fit the tiller in between. We laminated the tiller tube yesterday and is made of PVC tube with carbon around it. In the afternoon after the F1 races I started with the trailer to drill some holes in it to mount some bars on it to fix the cradle on. I did a lot of other small things but the pictures speak for them self's
I started with some sanding and cutting carbon for the arms. After laminating the arms I grinned the the back were I put some putty. In the afternoon I put a carbon filter for the toilet in place and mounted the compressor for the fridge with some bolts, this took some time because of the cramped space. As last job I cut a space for the bow pole, this pole can be rotated and is detachable. In the same hole there is coming a plate were the pulpit will be mounted on.
Yesterday I took the afternoon free to get some materials what were made by Stainless products. When I got home I installed the traveler with some bolts, I did use the weld bolts and some large rings and it looks need. I also installed a missing hose on the toiled. Today its Kings day and we were free so I spend the hole morning with cutting the gaps for the rudder mounts. The most of the time is measuring and trimming because you can do it only ones right. In the afternoon I made a arm for the rudder and for the remote tiller post. The holes for the tiller post were also drilled and filled with some putty. The stern cut out were the rudder case fits in was also filled with some putty. On the end I glued the arms to the post and the rudder case. They will be laminated with some extra carbon tomorrow.
I first trimmed some edges of the rudder bracket and than placed it in front of the heater to bake it. I then mounted the water pump. Fetske did then come to assist me with the outboard to do a trail fit on the motor bracket. The motor fits nicely but I have to see how easy it is to put the motor in and out off the water. We must make metal piece to lock the outboard in place when it is in the water. We did leave the motor in place and made the cut out a bit bigger. I then grind some foam away and filled it with putty. The post for the remote tiller gets shape as well, I made some bearings out of the UMPH plates. After the lunch we went to Thrill Seeker again to do the final anti-fouling. When we did get back I did some trimming of the rudder bracket and started with a cut out for the rudder.
Yesterday I sanded the bracket and cut all the necessary carbon piece to finish the rudder bracket.
In the afternoon we went to Thrill Seeker to put some anti-fouling on it but we did not have enough so today we finish it. This morning I laminated the bracket with the final pieces. When that is done we can cut some pieces out to mount it to the back and we than have make a arm for the remote tiller.
We started with filling the front of the bracket with some foam and HD putty. We first put some layers carbon in the top section and we than glued in the middle section some foam. The top and bottom sections were filled with HD putty of aerosil and glass fiber snipers. Fetske did do the motor bracket with another layer of DD paint and I grained a piece of the porthole rime from the toilet away so it could fit. When I did take look at the rudder bracket I saw that the epoxy was getting to hot on the top part. After some cooling the rest was under control. I also cut the rudder post for under the traveler. After the lunch I drilled the holes for the motor start key and filled the edges with putty. I glued with the rest of the putty a glass fiber plate in place what will be used for mounting the water pump. We then went to Thrill Seeker to take a look what we had to do before we can get her to the water next week. The only thing we have to do is put some anti-fouling on her. We also measured how high it was on the trailer because I had the idea that our new trailer for Thriller was higher but in fact it is lower so I can fix the cradle to the trailer if the weather gets better. I forgot to take some picture so I went back to the shed to take some. and grinned some HD putty and foam away on the rudder bracket, the damages is not that big and I have to grind away some more.


 Yesterday I took the afternoon free to get some materials what were made by Stainless products. When I got home I installed the traveler with some bolts, I did use the weld bolts and some large rings and it looks need. I also installed a missing hose on the toiled. Today its Kings day and we were free so I spend the hole morning with cutting the gaps for the rudder mounts. The most of the time is measuring and trimming because you can do it only ones right. In the afternoon I made a arm for the rudder and for the remote tiller post. The holes for the tiller post were also drilled and filled with some putty. The stern cut out were the rudder case fits in was also filled with some putty. On the end I glued the arms to the post and the rudder case. They will be laminated with some extra carbon tomorrow.


 I first trimmed some edges of the rudder bracket and than placed it in front of the heater to bake it. I then mounted the water pump. Fetske did then come to assist me with the outboard to do a trail fit on the motor bracket. The motor fits nicely but I have to see how easy it is to put the motor in and out off the water. We must make metal piece to lock the outboard in place when it is in the water. We did leave the motor in place and made the cut out a bit bigger. I then grind some foam away and filled it with putty. The post for the remote tiller gets shape as well, I made some bearings out of the UMPH plates. After the lunch we went to Thrill Seeker again to do the final anti-fouling. When we did get back I did some trimming of the rudder bracket and started with a cut out for the rudder.