Showing posts sorted by relevance for query rudder. Sort by date Show all posts

Thursday, April 27, 2017

Fitting the rudder bracket to the stern

Yesterday I took the afternoon free to get some materials what were made by Stainless products. When I got home I installed the traveler with some bolts, I did use the weld bolts and some large rings and it looks need. I also installed a missing hose on the toiled. Today its Kings day and we were free so I spend the hole morning with cutting the gaps for the rudder mounts. The most of the time is measuring and trimming because you can do it only ones right. In the afternoon I made a arm for the rudder and for the remote tiller post. The holes for the tiller post were also drilled and filled with some putty. The stern cut out were the rudder case fits in was also filled with some putty. On the end I glued the arms to the post and the rudder case. They will be laminated with some extra carbon tomorrow.


Sunday, May 7, 2017

The difference between the normal and HA rudder

Yesterday and to day we spend the most with Thrill Seeker to put him in the water and make him ready again. On the end off the day I did some small thing on the rudder bracket and put the first layer of filler on it. I had to touch-up the rudder of Thrill Seeker so I could see the difference between the two type of rudders. As last job I cleared wax plate of the rudder. This was a sticky thing and there is still some residue left on it what needs to be removed before the final layer of paint.

Monday, April 17, 2017

Filled the front of the rudder bracket

We started with filling the front of the bracket with some foam and HD putty. We first put some layers carbon in the top section and we than glued in the middle section some foam. The top and bottom sections were filled with HD putty of aerosil and glass fiber snipers. Fetske did do the motor bracket with another layer of DD paint and I grained a piece of the porthole rime from the toilet away so it could fit. When I did take look at the rudder bracket I saw that the epoxy was getting to hot on the top part. After some cooling the rest was under control. I also cut the rudder post for under the traveler. After the lunch I drilled the holes for the motor start key and filled the edges with putty. I glued with the rest of the putty a glass fiber plate in place what will be used for mounting the water pump. We then went to Thrill Seeker to take a look what we had to do before we can get her to the water next week. The only thing we have to do is put some anti-fouling on her. We also measured how high it was on the trailer because I had the idea that our new trailer for Thriller was higher but in fact it is lower so I can fix the cradle to the trailer if the weather gets better. I forgot to take some picture so I went back to the shed to take some. and grinned some HD putty and foam away on the rudder bracket, the damages is not that big and I have to grind away some more.

Friday, March 17, 2017

taped the front of the rudder

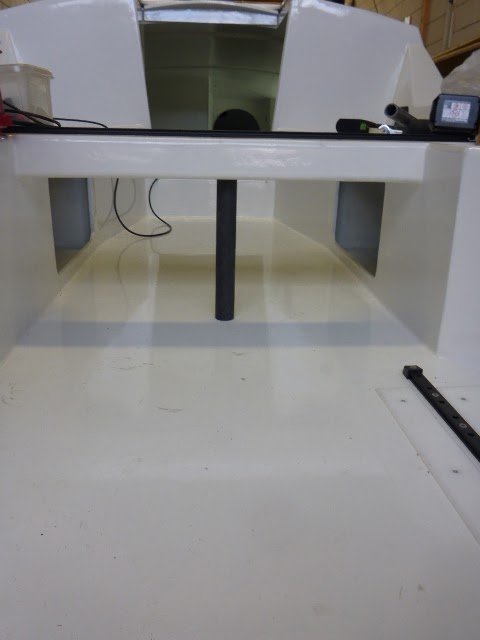
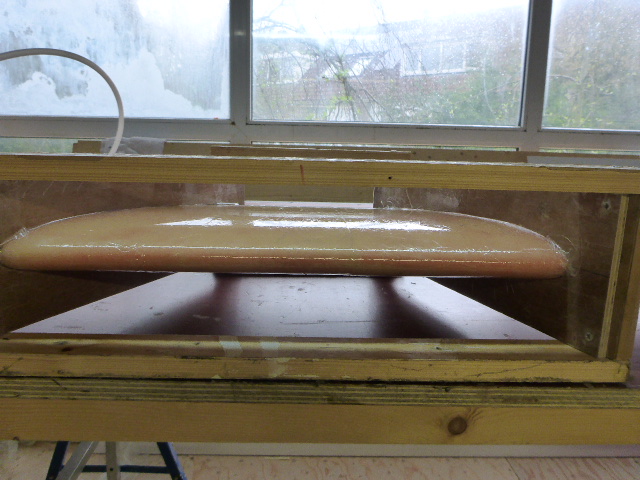
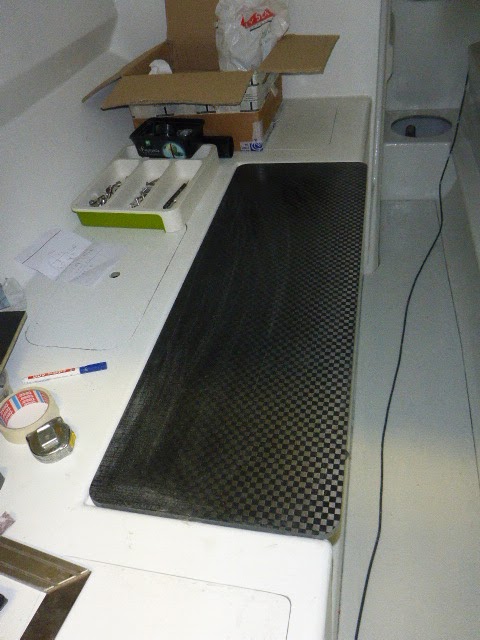
During the week I did some small things on the rudder like drilling holes and sanding the edges. In the morning I started directly with the rudder. I first made a vacuum back and then laminated the pieces what I did cut before. When finished I started with the block in the dagger board case to glue that in place but I first put a line threw the block to the top of the case. I had not enough bolts so I only put them on the corners, the rest will be later put in place. An other thing I did do last days was mounting the water tap in the toilet room. This was time consuming because of the narrow space.
Drilling the hole for the tap was a challenge, you can do it only right in one time because of the clear carbon. I also did some work on the hoses of the toilet, not much to see at the moment. In the afternoon I did some small time consuming things like drilling holes for the end stops of the traveler. I did also some work on the instrument panel locker but did not take photos. On the end of the day the laminated of the rudder was dry and I put some putty on the front so I can be sanded to morrow.

Friday, March 31, 2017

made the mold for the rudder bracket

I started with taping the inside of the motor mount so I can trial fit it this weekend without breaking it. When that was done I focused on the mold for the rudder bracket. Nico did draw a nice pair of drawings for me how to cut the molds. I did glue them on the wood to cut the profile of the rudder out of it. After some sanding it fitted nicely with ample room to spare. I did put the wax plate over the rudder, I had to re cut some pieces because it was on the short side. I finally put a packing tape on it to get a smooth surface. The end plates were aligned with some old battens. The carbon for tomorrow is also cut so we can start with laminating. I finally mounted the last after clamp and then went home.


Thursday, May 11, 2017

Primer on the rudder components

Yesterday I put some filler on the rudder components and made some base for the navigation lights.
The bases were made of foam and put to the sides with some putty. They have to made smaller and more round but the lights are now standing in the correct angle. Today I put some filler on the rudder components, the bracket will get another layer of filler now I can better see the imperfections.

Sunday, March 5, 2017

Glued the HD foam in the rudder halfs

We first started with unpacking the rudder half's. After that I started to work on a tool for my router to route away the foam what sticks up in the rudder half's. The HD foam was cut in the right corners and then glued in place with some HD putty. As last job for the morning I place a horizontal tube in the kitchen locker to keep lager objects in place. In the afternoon I started with the table to round the corners and some other small things. As last job for the day I made the backside of the locker for the instrument panel and glued it partial in place. The other part is removable.


Sunday, March 3, 2019

Rudder sensor

Today we glued a piece of glass fiber on the stern to mount the rudder sensor on. We also glued a piece to the rudder bracket to attache the arm of the sensor on. We had to glue a pipe thru the water ballast tank to get the cable of the senor on the inside. We think that this place of the senor is the best one because it is well protected from line what could ripe it apart.
We made some ventilation holes under the cockpit seats.
I did a trial fit of the razing bars and did line them up with a steel pipe what did go thru the mast base.

Friday, February 17, 2017

wrapping the rudder plug

Fetske painted the deck where no anti slip is coming so that we can paint the anti slip this weekend on the deck. Today I prepared the the rudder plug. I screwed the plug to the table and we wrapped it with vinyl. This was the first time for us and it was harder to get it right than it looks on the Internet when you see some guys wrap a car. It all looks so easy. We are also planning to do the sides of the boat to with the vinyl but with a different collar. Lucky the sides off the boat don't have sharp hollow corner. We have all material cut for tomorrow so we can start in the morning with laminating the mold for the rudder and put some masking tape on the deck.