Tuesday, November 29, 2016

finishing the dagger board case slot

I took the afternoon free to finish the dagger board case slot. After some sanding of the laminated I first put some primer on the bottom because it dries quick. In the meantime I lightly sanded the the paint layer by hand so that Fetske can do another layer tomorrow. When that was done I put some masking tape on the waterline. By then the primer was dry and I did put a filler on the slot and some other spaces were I did find some low spots. I then moved to the garage were I had one beam to do with some primer on the bottom. You can see the cradle in the background waiting for its trailer.


Monday, November 28, 2016

Painted the other side

Fetske did paint today the other side of the main hull. I went to the shed tonight with Fetske to look how it looked. I also cut a ruff hole in the laminated of the dagger board slot. I have tomorrow afternoon free so I can finish it and put some filler or primer on it to make it ready for the anti-fouling paint. I will also tape the waterline so Fetske can do a second layer of DD paint on it on Wednesday

Sunday, November 27, 2016

Painting the main hull

In the morning I started with the dagger board case slot to sand it and to fill some holes. When that was done I laminated a thin layer of carbon over it to make it a bit stronger. I than did give the dagger board an other layer of paint. After the lunch we watched the F1 grand prix. After the finish we went to the shed again, Fetske did a final layer of paint against the sealing and I put on one side a thin layer of paint. Maybe Fetske will do the other side tomorrow.


Saturday, November 26, 2016

glued the dagger board slot in place

In the morning I started with putting some primer on the beams and the underside of the cradle in the garage. I then went to the shed to make the slot fit  and cut it in three pieces. I drilled some small holes in the top of the slot pieces and screwed a piece of foam on it to hold it even with the bottom. In the afternoon I glued it all in place and put some pieces of foam in the center to press it to the sides. After some cleaning of the table and the dagger board I started with DD paint om the dagger board.


Tuesday, November 22, 2016

dagger board slot from the mold

Tonight I did take some time to get the dagger board slot from the mold and cut the edges away. I still does not fit in the dagger board case but it is almost there. I have to fill the sides first so it gets some more body. When I can fit it I cut away the center because there is not enough space there, so only the back and front will be placed.

Sunday, November 20, 2016

making the dagger board slot

Today Rob did come to help me because there was to much wind to sail his winter series. We stated with some sanding of the beams in the garage. We then move some stuff over to the shed to make a temporary mold for the dagger board slot. In the afternoon I laminated the slot with some carbon and putty with graphite in it. While I worked on the slot Rob did some sanding of the primer on the hull I did put on some days ago. The slot need some more putty later when it is shape the right size to fit in the dagger board case.

Saturday, November 19, 2016

put a filler and a primer on the beams and the dagger board

I started the day with sanding the dagger board till it was completely smooth, I than put a primer on on side. While that side was drying I also put a primer in the cradle so the epoxy is protected against UV. When that was done the dagger board was dry enough to turn over and do also the other side. As last job I put a filler on the beams. I hope I can make the dagger board slot tomorrow.

Friday, November 18, 2016

Taped the frond and back edge of the cradle

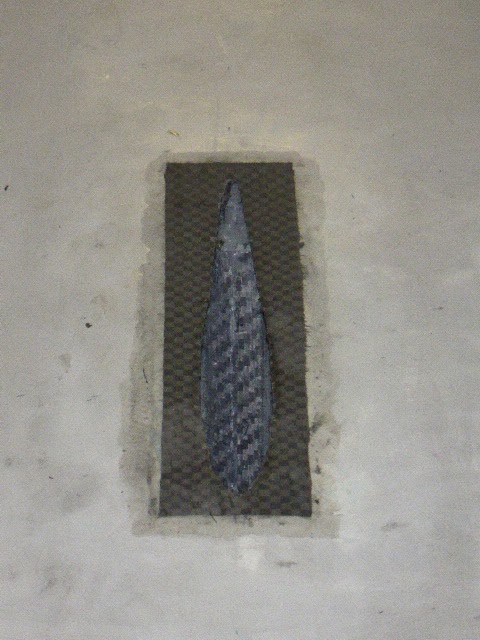
I started the day with some sanding of the dagger board but it was still a bit to soft to finish one side. I took the board home to our garage because it is easier to warm and get a higher temperature. There I did put a layer of filler on the other side, I had some filler left over so I did one top of a beam. In the afternoon I taped the frond and the back edge of the cradle. The only thing what have to be taped is the side edges of the supports, but they will be done later when I have cut the to the right length when the trailer arrives, I did get also a mail from my trailer supplier that my trailer was finished.
The red battens will be striped of the trailer and the carpet will be used for in the cradle.
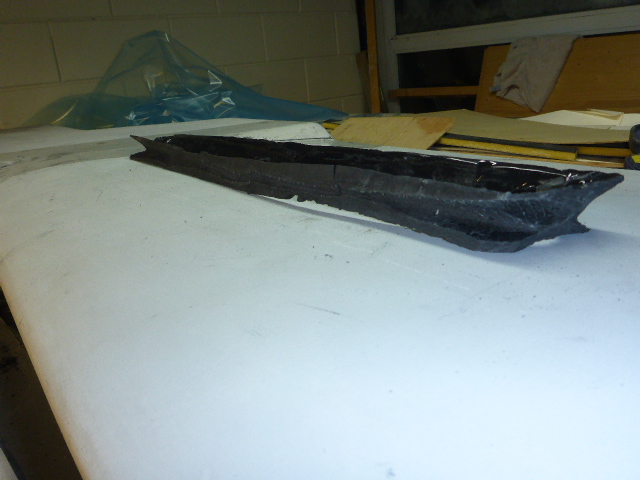

Thursday, November 17, 2016

making a slot for the dagger board in the cradle

Last two days I was on the METS at the stand of Colligo marine, I met some interesting people and see some new stuff for on the boat. Today I worked on my dagger board to give it a second filler on one site and put some primer on the bottom of the hull were the scrapes were from the cradle. In the morning I also saw a slot in the cradle were the dagger board is when the boat is on the trailer. I can then lower my dagger board when I need to rise the mast. The dagger board is much longer than the standard one and rise above the deck when fully retracted and is the in the way for the rising pole. On the end of the day I did
lay some fiberglass in the slot so the wood is protected from water.

Sunday, November 13, 2016

short weekend

I had to work on Friday and on Saturday we had a meeting from our multi-hull club CTC
Saturday morning I did some sanding of my dagger board and put some primer on one side so that I better can see were the low spots are. As last thing I filled the edges off the cradle with some putty.
Today I first did drill some holes were the dagger board can be lowered and were the log is placed. The rest were the dagger board is will be cut away. In the afternoon we taped the sides off the cradle so the wood is sealed. Today our parents coming to visit so we had to stop early.

Sunday, November 6, 2016

lift the cradle of the hull

I started with putting a wedges between the hull and the cradle this was easy to do and with a larger batten between then the cradle did come loose. I did put some wooden blocks under the cradle so I could easy cut the edges away before we did proceed. We then pulled the cradle to the back and out of the shed. The front of the cradle made some scrapes on the hull because it is narrower than the back and I had not put some thing under it. The sides were rounded with the router and sanded, they get a tape later. We transported the cradle to our home because we have more space in the garage to finish it there. When did get back we did a trial fit of the dagger board and it fits very nice. I gave one side of the dagger board a blue filler and I did put some on the scrapes.


Saturday, November 5, 2016

Laminated the vertical supports for the cradle inplace

Yesterday I laminated the the supports with glass on both sides so that the wood is packed in glass. I also started with some blue finishing filler on one beam. Today we started in the morning to glue the supports in place with some putty. The after support will be done later I think it has to go more to the front because the trailer beams end there. I place them when we have the trailer at home and we can trail fit the cradle. In the afternoon when the putty was a little harder we taped all the corners.
On the end I put some markers with a laser liner so I can later easier cut the supports on the same height.