Sunday, October 30, 2016

Thrill Seeker to the winter storage again

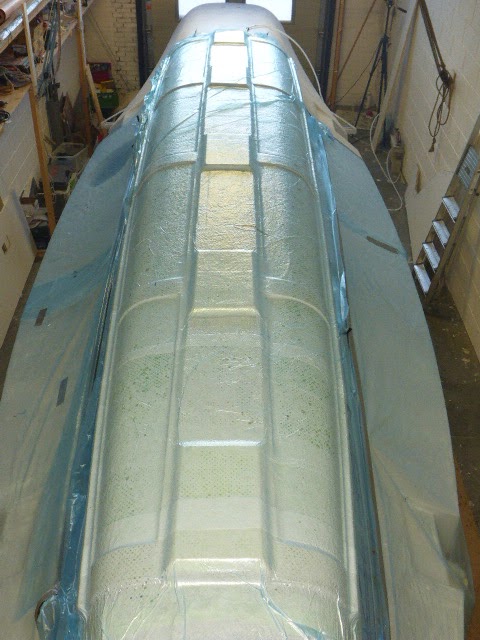
Today we did take Thrill Seeker out of the water again and did bring it to its winter storage. She is still for sale. So we had not much timer left of the day, we only unpacked yesterdays laminating work, it still had some air pockets in some sharp corners but I injected them later with some putty, over all it looks good.

Saturday, October 29, 2016

put a final layer of glass over the outside of the cradle

In the morning we did some prep work as sanding and routing some edges of the wood to laminated the outside with the last layer of glass. The vertical panels will be tape to this glass work after they are glassed to. I put some putty in the sharp corners before we put the glass over it. The vacuum is very help full to get everything nice flat and in the corners.

Friday, October 28, 2016

some more stuff for the cradle

I placed some extra wood where the vertical supports are coming. On the side of the center support I glue some triangle foam and wood to make it easier to laminated it later. On the end of the day we placed some triplex strips under side batten to fill the cap. We first did it with PU glue and when that was dry we poured some putty in the rest of the caps.


Thursday, October 27, 2016

Gluing the center support of cradle on it

I took today free to work on the cradle again, it all takes longer than expected and it is a lot of work.
We used the old battens of the mold frames so this clears the pile of wood we still have. Fetske cleared the battens of packing tape while I cut the support frames. These had to be shorter because the side battens of the cradle where now in place. the next job was to fill the gaps between the supports what I made of two layers triplex. I filled the space in between also with two layers of triplex. After that all was in place I could start with gluing the battens on it. But before we could do that we first sanded the the rest of the packing tape of it what was still left on some places.


Tuesday, October 25, 2016

placing triplex strips on the cradle

I took the afternoon free to do some work on the cradle again. This time we placed two layers triplex on the place were later the vertical panels will be placed. First we glued them together with PU glue and later we did make some putty to put them on the glass fiber.


Sunday, October 23, 2016

Unpacking the cradle

I had some computer troubles on my work yesterday evening and today so I could not do much, but when I arrived at home I did see that Fetske was still on some working clothes and told me she had unpacked the cradle. This are things I like it ;-). The peel ply is still on it because the laminate has to harden more. We did use 50% slow harder en 50% standard harder because we were afraid that we were not quick enough to do it only with standard harder. We found out that after all it maybe was possible .

Saturday, October 22, 2016

Laminating the cradle

Yesterday was a bussy day, in the morning I prepared the dagger board. In the afternoon we laminated the dagger board for the last time, this time on both sides. We the went to buy some extra harder for todays job. When that was done we went to our rigger to talk about our carbon mast and to seal the deal.
Today I started with sanding the dagger board and in the afternoon we laminated the cradle for our trailer


Tuesday, October 18, 2016

Laminated the dagger board on the other side

I took the afternoon free to laminated the dagger board on the other side. I first unpacked and cleaned it and then Fetske dropped by to assist me. We did sand some edges and cut away some carbon so it was ready to take another layer. Fetske cut some bleeder cloth and peel ply while I was preparing the vacuum back. The laminating was a quick job again. After punting on the vacuum we had a tea break and after that we cut some mold for the five wooden ribs what will be place under the cradle. I made the from the form frames of the main hull.


in this stage 17 kg estimated weight 19 kg
Update unpacked still one layer to go

Sunday, October 16, 2016

Laminated the dagger board on one side

In the morning I prepared the dagger board to laminated one side. In this stage it weight just under 15 kg. I decided to do only one side because I can then sand the edges of the laminated so that you have a smoother surface were the layers lap over each other. An other advantage is that it is easier to do. In the afternoon Fetske did come assist me with the laminating, this was relative quickly done, so we had much time left. We did first a tea break and we than started with preparing for cradle again, I did find some old thick plastic what I put over the bleeder cloth to get some extra spacing. When that was in place we put a layer vacuum film over it to get a smooth surface. We already place the two layer of 625 gr/m2 on it. The vacuum back what is going over it all is glue on one side with tacky tape. At last we put some old vacuum film on the sides so that the stays clean when we are laminating.

Saturday, October 15, 2016

trimmed the edges of the dagger board and did a trial fit

In the morning I directly started with unpack because I was very curios about the result. After lifting out the dagger board out of the mold the result was promising. I did cut the carbon away with was coming out of the middle on the edges, after some sanding by hand the result looked very good.
I than did a trail fit in the dagger board case to see how much room I had still left for the other two layers and I have room enough so I don't have to weary about that. The dagger board has not much room to the sealing to get it in.
I then drilled the holes for the control lines, this was not easy because you have to drill to all the carbon UD layers. When I finally cut threw, I clued some tubes in place.
While that was drying I started to make a begin with cradle for the trailer like Phill did made for his F85SR. I tape the holes and I cut some glass fiber and some other pessary stuff.
Tomorrow we go further with the dagger board.


Friday, October 14, 2016

Glued the dagger board half's together

Yesterday I put some more putty on the side's of the center piece to fill the left gaps. Today I started with preparing to glue the half's together, This time I used the other mold half to put the dagger board in. I did put some packing tape in the mold so that the half does not stick when some epoxy comes between them. I cut a piece of carbon to put between the half's to compensate the height of the center piece what is a very little to high. With one layer between them it is just right. In the afternoon Fetske did come to assist me with gluing the half's together. We first punt some putty on the foam and than laminated the carbon biax over it. We then put some putty on the other half also over the center piece and finally put some putty on the first half where the center will fit in this was well done so that there is enough to fill the gaps around the center piece. We that closed the vacuum back and put as much pressure as the pump can get (-0.95 mbar) to squeeze the half's together. After the tea break Fetske did leave and I did some sand of the last prime I did put on the hull so it is now ready to punt paint on it.


Tuesday, October 11, 2016

Glued the HD center piece in place on one site

Yesterday I glued the HD center piece on one site in place. I did use some epoxy with glass bubbles to do it. Before I could glue it I had to scrape the bottom of the channel and I even had to grind some biax carbon away because the piece is a little to high. I used a vacuum back to get the piece as tight as possible to the bottom of the channel and suck the air out of it, I also injected some epoxy and glass bubbles to the sides when the piece was in place. Today I unpacked it and the result is ok, but I forgot to take some pictures.


Sunday, October 9, 2016

Laminated the centre HD piece

I started with unpacking the mold and then glued the HD pieces for the control lines of the half what was used to support the mold. While that was drying I sanded the foam away of the after edges and bottom and fill it with a HD putty. I also sanded the inside locker so it could be painted later. On the end of the morning I cut the necessary pieces for the center piece. In the afternoon we rolled the HD foam in three layer bi axial and placed it between two wooden pieces to keep it striated. After a tea break we decide to put the boat level. We use the car jack to lift one side. When it was level we put the water line with a marker on the hull, this time the lines did meet at the front at the same height. The old lines can still be seen. On the end I painted the locker.


,

Saturday, October 8, 2016

Laminted the dagger board mold second stage

In the morning I did de-mold the dagger board half from the mold and cleaned the inside edges of the mold. The dagger board half's did need to get a channel for the HD core so I took the router to make the channel. I also made the position for the HD pieces for the control lines. When all that was done I made the HD core of four layers foam glue together. At last I glued the frame to the mold with pu glue.
In the afternoon we laminated the extra layer glass to the mold and the wooden frame.  On the end I sanded the core to get away of the glue edges and routed the edges round. On one dagger board half I glue the HD pieces in place for the control lines.


Friday, October 7, 2016

Laminating the other dagger board mold half first stage

In the morning I put a putty mixture of glass bubbles and graphite on the dagger board half as a sort of gel coat. In the afternoon we laminated over the putty mixture with layers of glass one 400 and one 625 gr/m2. After a short tea break we painted the complete bottom with grey primer, this is the last one before the top coat and copper coat will be put on.